
This is the only DIY Lisa Frank makeup tutorial you’ll ever need. Promise.
Did you know Lisa Frank makeup is actually going to be a real thing? A real actual thing you can put on your face? The Lisa Frank makeup line originally started as a kickstarter with Glamour Dolls Makeup,with a goal of $30,000. Unsurprisingly, they totally smashed out of the park by getting over $100,000 (!!!) more than their goal. Because we’re already big fans, we’ve celebrated before with Lisa Frank nail art. This time we’re going much bigger and wearing the delightful rainbow of makeup inspired by the one and only Lisa Frank right on the eyelids.
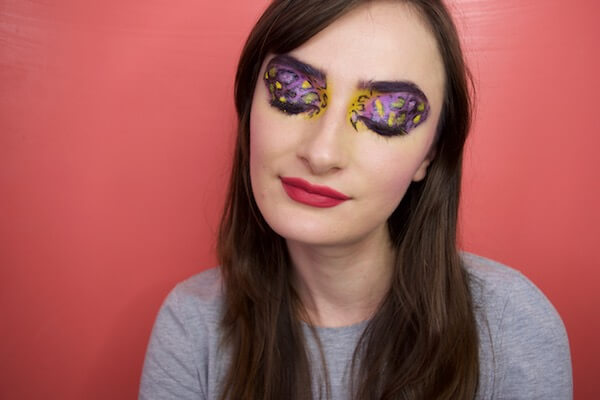
Before we start, let’s just all get on the same page. This isn’t low-key, cute, Lisa Frank makeup that you could wear to the office. It’s more like the all out, over the top Lisa Frank makeup you’d wear to a … ’80s themed rave? It’s a look, we’ll say.

Because we’ll be loading up the eyelids with all kinds of eyeshadow and eye liner, we’re bringing out the eye-priming big guns. Instead of your average eyeshadow primer, we’re using the NYX Glitter Primer for even more wear time and stickiness. You’ll need that stickiness to be able to hold onto everything we’re about to throw at the eyelids.
Also, because we’re using lots of bold colors, we’re doing the eyes in entirety first, then moving on to the rest of the makeup. This is helpful because bold eyeshadow can have fallout that lands on your cheeks. This isn’t totally ideal and is a pain to remove from your foundation. Make your life easier and do foundation last!

The first eyeshadow is a hot pink applied from the inner corner and ending in the middle of your lid. We’re going from lash line all the way up to brow on this look because subtle just isn’t going to cut it. We suggest applying with a firm eyeshadow brush for the best color payoff. Mirror the same starting and ending spots underneath your lower lash line.

Next up: purple. We’re a little obsessed with the Lisa Frank quintessential mix of pink and purple, so it’s the basis of this whole look. Taking the same dense brush, apply a dark purple eyeshadow from the middle of the eye, outwards. We’re making an oversize cat eye look with this, so we followed the angle of the lower lash line upwards. Then, we connected it by following the angle of the brows downwards. They meet in the middle for a soft cat eye angled look.

Like we said, this look is not subtle in any way, so inner corner highlight is also following the brow down approach in a bright yellow. We suggest applying the yellow with a fluffier brush, so you can blend the edges.

To really accentuate the feline look of this eye makeup we’re going to be tight lining. Using a deep purple eyeliner, darken both your top and bottom waterline. Then, extend the line through the inner corner to get that feline effect.

We are finally getting to the most exciting part of Lisa Frank makeup, the leopard print. Yep! We’re doing leopard print on the eyelids. To get this effect use a black liquid eyeliner to draw the rosettes. Basically, you’ll want to make shaky, almost complete circles with an opening.

Keep creating the rosettes until you’ve covered your entire eyelid. You can fill in any missing spots with dots.

While you let that eyeliner dry (because it needs to be 100% dry before the next step) fill in your brows. Because this look is so extra already, we’re using the same eyeliner as before to create a dark purple brow. Why not?

Once that liner is totally dry, you can start to fill in the leopard spots with the rest of the Lisa Frank colors, lime green, light blue, and a little more yellow for good measure. To get a somewhat precise effect, we’re using a densely packed pencil brush with a fine tip.

To make the colors actually show up, it’s best to work with a dampened pigment. You can easily do this with loose pigments, or a pressed pan eyeshadow. Just dampen the brush (we use plain eye drops) and pick up the eyeshadow.

Then, using the pencil brush you can apply to the inside of random rosettes to get that Lisa look.

Finish off this whole adventure with a good couple of coats of mascara. Also, after you’ve finished on the eyes, you can do the rest of your makeup!

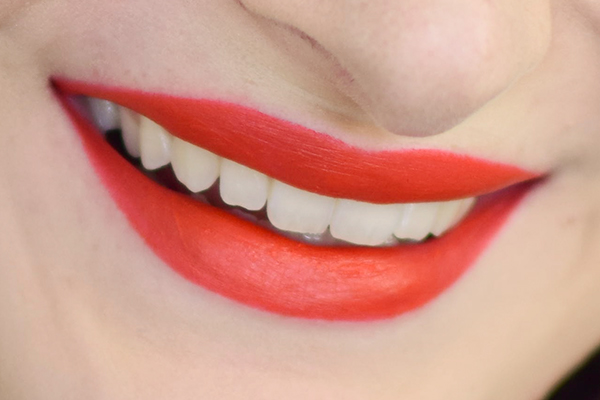
We decided that the eyes were so intense that the rest of the face shouldn’t be. We just used a light, dewy foundation, a light dusting of pink blush and a pink lipstick to finish things off.

What do you think, Lisa Frank makeup, yay or nay?

Love this article? For more beauty, style, travel, and trending topics check out The Luxury Spot on Facebook. Like us and we’ll love you back!